Thursday 22 May 2014

Strawberry Print Nail Art Tutorial (Step by Step)

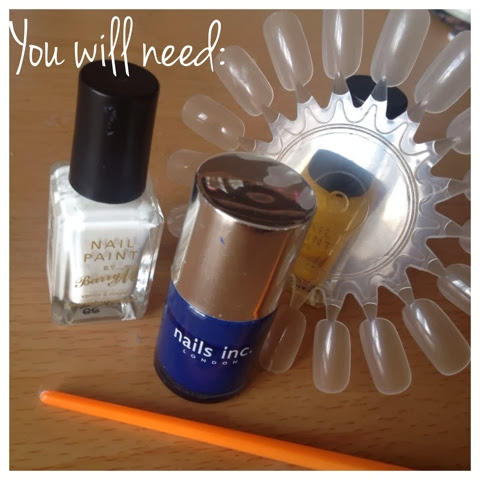
Hola chicas! I'm gonna jump right in and say how CUTE is this mani! I had a slight strawberry craving when I painted these and believe me, they are super-duper easy to recreate!  All you need is a red, yellow, green and nude and you're ready to go! 


Step 1: Paint your nail in 2 coats of a nude/natural shade. You don't want anything too bright because the strawberries are already fun and colourful!


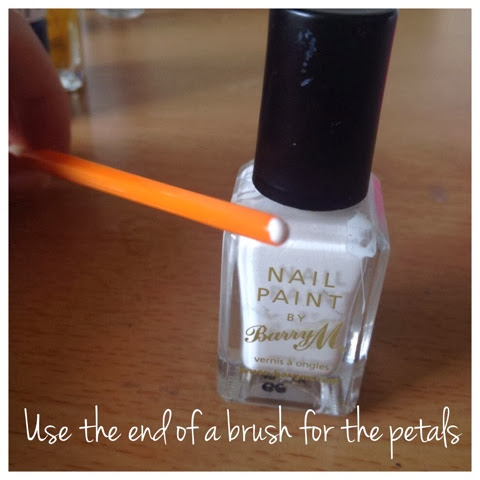
Step 2: Create little red triangles across your nail. Don't make it perfect though :) 


Step 3: Using a dotting tool/toothpick/bobby pin/tool of your choice create teeny weeny yellow dots on the red triangles.


Step 4: Using a brush/toothpick create the leaves of the strawberry using a green. i kind of created a curved cross to get a more 'natural' looking strawb!


Seal in the design with a topcoat and there you have it! A super easy strawberry print nail art look that looks complicated but easy to achieve in 4 simple steps!

Below you can see the colours I used from Models Own:


L-R
Utopia, Watermelon, Banana Split, Turquoise Gloss.

Please do let me know what you think of the design!

Lots of Love,

The Nail Polish Bible

xoxo

P.S. I do apologise for the camera quality and lighting! Next time will be better!

Monday 14 April 2014

SPRING NAIL ART: Lilac Dream Floral

This design is a must for spring time and it is super duper easy to recreate and it looks cute in a variety if colour combos!


How to recreate this look:

1. Prep your nails with a base coat
2. Apply Lilac Dream or any colour of your choice as a base colour 
3. Using a paintbrush/nail art pen/toothpick create pink blobs on your nail leaving enough space for leaves after (except the ring finger)
4. Using your tool use White Light to lightly create a rose print 
5. Using Edameme create the leaves in a 'V' shape 

For the ring finger:

1. Draw a black heart using black magic
2. Repeat steps 3-5 

And finally seal in the design with a topcoat, I used Models Own 5 in 1

Remember you can recreate this look with any colour combo so send me your designs and I would love to see your take on this cute spring mani!


Lots of Love,

The Nail Polish Bible 

Xoxo

Don't forget to follow me on Instagram and Twitter: @naramackenzie


Saturday 15 February 2014

New: Nails Inc Gel Effect SS14 Polishes


Wow!

I am obsessed! These SS14 shades are so gorgeous and vibrant and scream me all over! The 5 colours* that I have are such beautiful, glossy and perfect shades for Spring/Summer. I'm going to tell you a little bit more about the seasonal colours that Nails Inc have created….

The shades have what they call "plasticiser technology" which makes it look just like a gel manicure, fresh from the salon but without the UV light! Every colour is pigmented, has an easy application process because of the wide brush and as you will see in a photo below, you can remove the cap which makes it much easier to apply the nail polish!

The coverage is sensational and the plumping effect minimises any imperfections, such as ridges, on the nail.


Soho Place is a gorgeous aqua gel colour that just pops on any skin tone. I've seen this colour on darker skin and looks amazing! So this is a win win colour for everybody!


Mercer street is a gel effect blue which is just the right shade of blue for me! It's not too bright yet not too dull and this colour would just compliment and tan perfectly. I mean there's a reason why it's a SS14 shade!


Downtown is such a cute hot pink colour that immediately pops on your nail even if there's just one coat on! I am very picky when it comes to pinks and I can say this shade is in my good books :) The pink is not 100% hot but just has just the right amount of intensity. 


Kensington Passage is a coral effect gel polish. I am a HUGE fan of corals and this colour just melted my heart the second I painted it on! Coral never goes out of fashion, I'd either wear this colour on a holiday or even rock it on a night out. 


Finally, here is Mayfair Lane which is a pale pink gel effect polish that floats my boat! I am in love. I can't express how beautiful this looks in person, the photo doesn't do it justice! It's so stunning and flirty and cute to wear, I can't wait to match this up with an outfit this summer!


One final thing about these nail polishes…you can remove the rectangular caps to allow an easier application! How awesome!? Well done Nails Inc for thinking of that!


What's your favourite shade from the SS14 collection?
I'd love to see if you've tried them out and what you think of them!

Lots of Love,

The Nail Polish Bible

xoxo

*PR Sample


Tuesday 4 February 2014

Step by Step: Easy Valentine's Day Nail Art Tutorial: LOVE


With Valentines Day just around the corner, I've recreated a nail look to wear on the day. 

I was inspired by Rebecca from Lane's Laquers for a Valentine's Day nail art look that is so simple and easy to recreate. Check out her design here

The colours that I used are Dragon Fruit from Barry M's Gelly collection, Passion Fruit from Barry M's Gelly collection and Black by Barry M. 


The picture above shows one coat of "Dragon Fruit", paint 2 coats in order to make it opaque. Allow it to dry completely before moving onto the next step otherwise the design will mess up.


Using a fine brush, paint the outline of the letters "LOVE". As you can see in the photo I created some space to fill in with a red/coral colour. 

Don't worry if this isn't perfect as you will be correcting this after the next step.


Using the same brush, fill in the gaps with a red/coral colour. I used "Passion Fruit" by Barry M.


Finally, touch up the design and seal it with a top coat. I've used No7 Stay Perfect which makes your nails touch dry in 60 seconds. 

You can change up the design by using your own colour scheme!

Do you like this design?

What will you be rocking on your nails for Valentine's Day?

Lots of Love,

The Nail Polish Bible

xoxo


Monday 3 February 2014

Daisies All Over Tutorial

I decided to upload a tutorial on how to recreate "Daisies All Over". This was requested by Daniela (from danielascribbles.blogspot.co.uk) who has such a cute blog on beauty, so show her some love and press that follow button.

Here you can see what I used, I used the end of a brush to create this look to get the rounded petals.


After your base coat follow these steps to create the perfect Spring nail art! 


First paint two coats of a navy blue, I used The Serpentine by Nails Inc.


Be careful not to overload it with too much polish otherwise the petals will come out too large.


For this next step you want to lightly press the end of the paintbrush onto your nail. You need to win to create 5 petals that connect. Then finish off by filling in the space in the middle. Keep an eye on the spacing too so they're not too close together or too far apart.


Using the same technique, create the centre of the flower with a yellow. I used Yellow by Barry M.


Of course, seal in the design with your favourite top coat. I am currently using No7 Stay Perfect Top Coat which leaves nails touch dry in 60 seconds.


Let me know what you think of this design! 

Do you want any more nail art tutorials?

Lots of Love,

The Nail Polish Bible

xoxo

Friday 31 January 2014

New! La Roche-Posay Effeclar Duo [+]

Last week I was invited by Lisa (from ThatLisaClare) to the launch of the new La Roche-Posay Effaclar Duo product at the IceTank Studios. There I learnt all sorts of fun and exciting facts about their new project and got to play with all these fancy products.


You've probably heard of Effaclar Duo which was released in 2009 (seems a decade ago!) which was designed to eliminate severe skin imperfections and unclog pores.


La Roche-Posay has introduced Effaclar Duo [+], an anti-blemish cream that is formulated to target oily, blemish-prone skin. It is also clinically proven to correct the appearance of those pesky little blemishes. On top of that it also unclogs pores and refines the look of skin texture. They've even kept in mind the issue of sensitive skin. Also you see visible results in 24 hours! In 8 days, it is said that imperfections magically disappear and 4 weeks on you are left with a nice skin texture, unclogged pores and less oily skin!


To be honest, I'm not prone to acne, nor do I have oily skin. However, I might give it a go to unclog some pores to reveal some fresh skin! I shall update on that in the future.


Thank you to everyone for making the evening fabulous!

What are your thoughts on Effaclar Duo [+]? Have you tried it out yet?

Lots of love,

The Nail Polish Bible 

xoxo

Monday 27 January 2014

Daisies All Over

I absolutely adore floral prints (if you couldn't tell by now!) and this is one of my favourite looks when it comes to flowers! 

For this look I used a navy blue base coat which is "The Serpentine" by Nails Inc and for the petals I used Barry M's "White" and for the centre of the flower is "Yellow" by Barry M. I didn't use brushes to create this look, instead I opted for the end of paintbrushes. This not only makes it easier to recreate this look but makes it super duper fast to do too!


I'd love to know what you think of this look especially as it's coming up to Spring time and I'm looking forward to creating more interesting and pretty floral nail art! 

Don't forget to share the post with your nail polish buddies! 

Lots of Love,

The Nail Polish Bible

xoxo